Time to complete: 2 weeks.
Why not?
It took me 2 months to buy the dish rack. [and 1 week to buy the towel which is included in the project time] Besides, aren’t you tired of seeing tutorials that say you can make an entire quilt in a hour? You look at it and feel inferior before you even try. Well, if you make this, you can beat my time, and feel awesome.
I saw this nice dish rack at the store back in December for $20, but it only came in white, black and turquoise. The curtains I made are turquoise, with birds, and bird feeders with bits of red in them by Judy Niemeyer , and I need some more red in my kitchen! Not to be defeated, I went home and googled it. I found the red, but it was $50!!! I’m not paying that, so I back burnered it.
A couple of weeks ago, I was at the store again, and there were those dish racks taunting me. Now the black was sold out, but I didn’t care. I wanted red! Then it hit me. I can make red happen. I bought the white one, got it home, and got to work.
I don’t know why I googled it. I wasn’t going to pillowcase the stupid thing. I am going to quilt it! You betcha!
I think I will play with my Strip Tube ruler I bought months ago.
I measured the counter top and decided I want it to work out to be 23 +/- 1″ by 26 +/- 1″
I figured 4.5 finished blocks would take me there, and went with 2 1/4″ strips.
I first sewed the turquoise to the red I had bought for hot pads and the like, then sewed the two strip sets together with opposites facing each other.

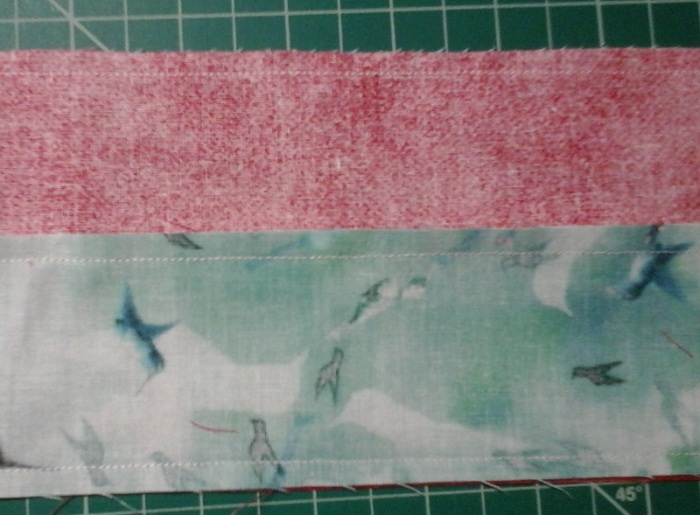
I skipped the instructions, and placed the ruler over the seam, as high as it would go without the peak hanging off the top, which turned out to be the 5″ mark. Gee, I did that right, didn’t I?

Open them, iron, trim ears.

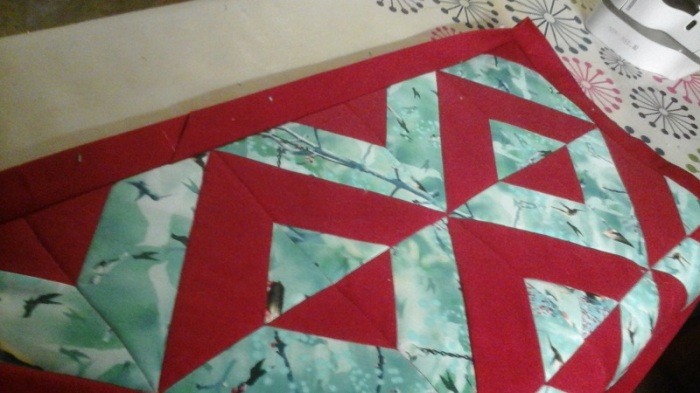
I played around until I got kind of a inside out on point pattern.
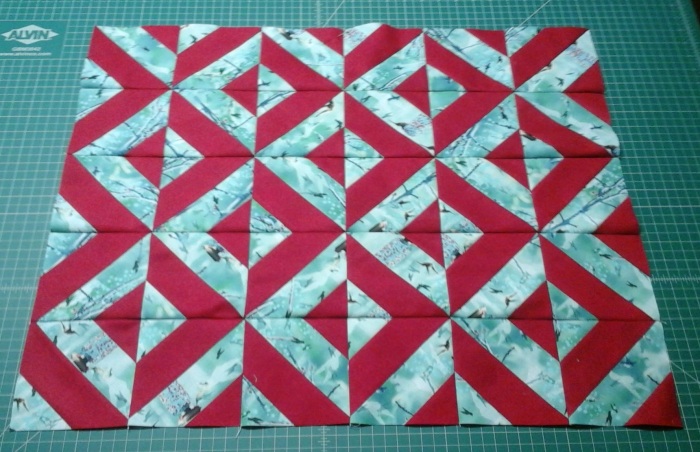
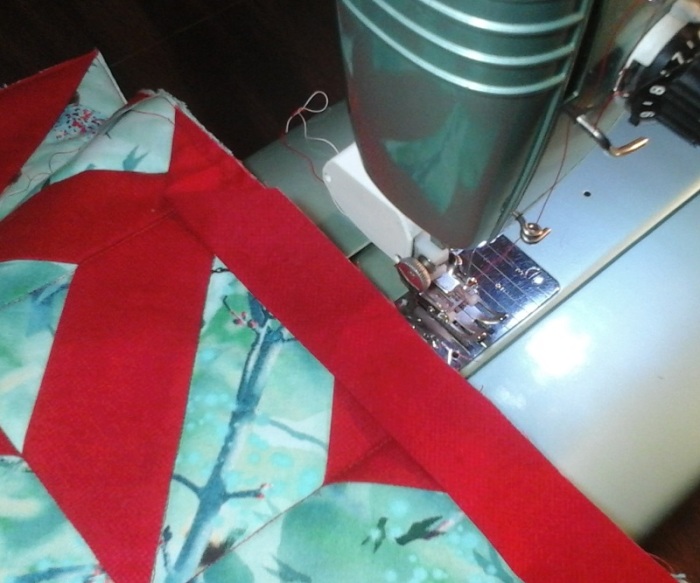
I like to lay it out, admire it for awhile, then flop em over on each other, and pin it on the edge I will be sewing incase I lose my mind and forget where I am to sew. Hey, it happens!

Of course I have a quilt going on and Mustang has white thread with the 1/4″ guide already installed, so rather than run these pieces through, stopping to pin the rows, and starting again to sew the rows, I will run a piece of the quilt through every time I need to stop, and just leave it there until I start again. Some call these leaders and enders. I call it multi tasking.

Now the backing. How about a nice thick towel? I couldn’t find one I liked that didn’t have that wide flat band on each end. I ended up getting one big enough so that when I cut off the ends with the bands, I will have enough left over to make 4 hanging towels. Yeah, I could buy towel-like fabric, but I like this better for $9, and can you really put a price on having pre finished ends for hand towels? I didn’t think so.

I was going to practice some free motion quilting, but I am a Ditch Girl, and I liked the pattern sew much, that I didn’t want to ruin it. I’ll learn later. Yep, I’m going in the ditch. I like it there. It’s nice and quiet, and no one bothers me.
I sewed around the outside before trimming it because this stuff sheds!
I did get to practice my binding. Yay!
I sewed the binding strips together, and the mailman came.
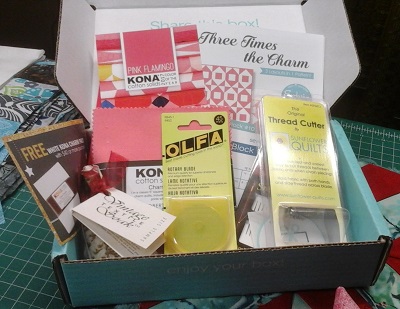
My Sewing Sampler box had arrived. It was my very first, so I had no idea what it would be like. It contained a Kona color of the year charm pack, a pattern, a 45mm blade, needles, fabric wash, and a thread cutter thingy.
and another box, of something Brat [who uses our address because she was stationed in Japan], sent to her friend but it got returned as undelivereable. What is it?


What to do? Oh cake. Lets do that first. Open cake, taste cake, improve cake. There, that’s better.


By the way, I heard you gasp when you saw the can of Sanders chocolate sauce on this quilt, but remember it is a dish drying mat. It will get dirty.
Back to the sampler box, which happens to contain a thread cutter. Let’s try it.


It works! I really thought the little thing would topple over when I push the thread down on it, but it didn’t. Would I buy one? Nope. Am I disappointed? Nope. The handy thing about this is, when you are seperating a bunch of strips or chain sewn pieces with scissors, you always run the risk of cutting into the fabric. This gadget pretty much prevents that. The blade is so far down, it would be difficult to get fabric down there.
Now on to the binding!
I use what some call the pocket method. I could learn a different method, but not today.
Basically, once your binding is made [I use 2 1/2″ strips ironed in half], you open part of it, iron a dog ear [left side down if you sew on the right], and sew it on, starting at the point for about 6 or 8 inches. Then you sew off of it.


Fold the binding back over and start sewing where I left off.
I keep my binding wrapped on a piece of cardboard, and lay it down as I sew.

I sew off the corner, and do the corner fold, which took me forever to figure out what the heck those books were talking about. I like corners now. Mostly because each one brings me 25% closer to being done.


Now when I start getting back to that pocket, I stop with the needle down. Then lay the binding down [that is how I measure it] and cut at an angle about 2″ past the begining. One inch is probably enough.


Then I tuck it in, and finish sewing it down.


Take it to the ironing board and iron the binding flat, leaving the corners alone for now.
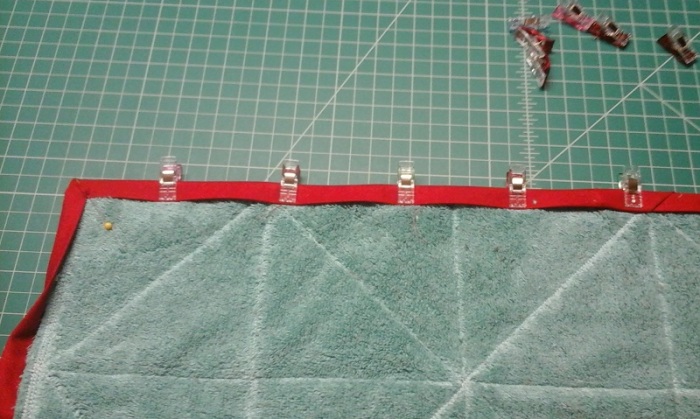
Flip it over and pin the corners.

Iron the binding over making sure it covers the stitch line, and clip it down. Don’t you just love these little guys? I have like 200 of them!
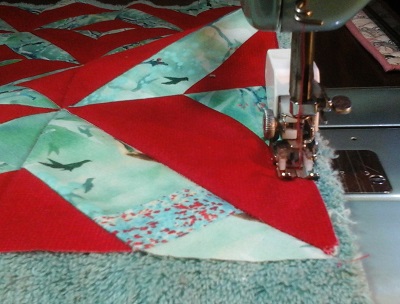
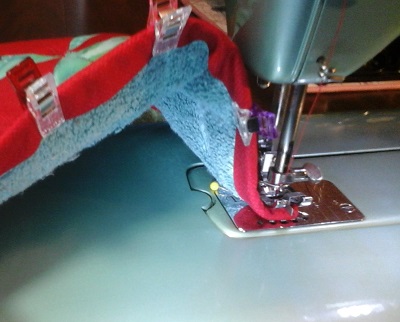
I will be sewing just outside the binding which will catch the other side.
hmmm, should I use walking foot or my ditch foot? Some machines have a needle left/right adjuster knob which would let you use the walking foot. Some don’t and you will have better luck with the ditch foot. My Viking does, but . . . .


You know it! In the ditch it is!
I hand turn the wheel to bring the needle down and make sure it’s going to go where I want it. Nope. Gotta switch adapters. I knew one of these wasn’t the right one.

I remove the clips as I get to them, and since my corner pins are on the back side, I remove them when I get real close, stopping with the needle down.
and we have a winner!
6 blocks across, and 5 down made it 22.5 by 27.

Oh. I guess that means I have to wash dishes now.
#EasyBindingTechnique #TheTiesThatBind #JellyRollStripPattern #ThingsihateToDo #YouJustCantBuyAwesome

“You just can’t buy awesome”…..I will be quoting you! Love it!
LikeLiked by 1 person
Hi again,
I agree – I love the title of this post! And, so true – you just cannot buy awesome. ~smile~ Roseanne
LikeLiked by 1 person
Well, I supose some people could try to buy awesome, but most can’t afford it.
LikeLike